Post by Geewoody on Nov 4, 2006 11:43:23 GMT 10
Well, first things first, whats a grunge sig? Grunge is a style of design that is becoming increasingly popular. You've probably seen it on album covers or movie posters. The main idea of it all is to creat a total mess in the background and include just as messy graphics. Sound easy? It is. 
Now all you SV veterans should know I work in photoshop, so fire yours up. Just like my previous tutorials, Ill list the steps, all you have to do is follow em.
1.)Create a new pic, size it 300x150 and set the bg to transparent. Make sure your colors are set to their defaults. (black and white, just hit your d key to be sure)
2.)Go to filter> render> clouds, then filter> render> difference clouds. You should have something like this:
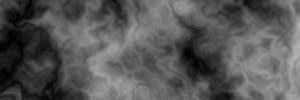
If it seems too dark or light just go back to difference clouds a couple times.
3.)Next your gunna need some grunge brushes. Plenty on www.brushes.net.tc/
Once you have them uploaded, set your color to black. Make a new layer and dab a few random brushes around. (personally I dont like to use the same one twice) Should have something similiar to this:
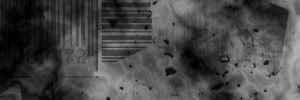
4.)Now make ANOTHER layer, and repeat the last step but with white.
5.)Repeat one last time with black. Make sure to delete/redo any layers you dont like.
I've got something like this so far:
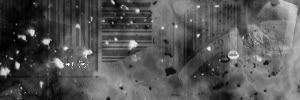
I know it still looks ugly, but bare with me. ><
6.)Layer> Merge Visible
7.)Google up a picture, lower its saturation so its grey (Enhance> Adjust Color> Hue/Saturation) and paste it to your sig. Transform (Command T or look under Image) and move it around til it looks like it fits.
THE RESULTS SO FAR:

8.)Now to give it some color! Go to Layer> New Adjustment Layer> Color Balance
This is purely a mess around tool until you get used to it, find a color you like.
9.)Make a new layer. Select All (Command A), have the rectangular marquee tool selected and right click the picture. Select Stroke. 3 pixel width black, repeat with 2 width white, then 1 pixel width black.
10.)Merge Visible. Duplicate Layer. Filter> Blur> Gaussian Blur, set it to 2.5
Change its Blending Mode(its in the layers box), theres a lot of variables for what you should pick so try a few, I went with lighten. Add text and polish it up a bit and your done. Hopefully you didn't follow this guide exactly, I sure sure as hell didn't. Post your results!

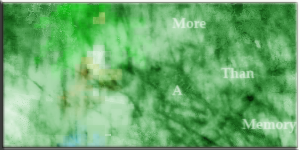
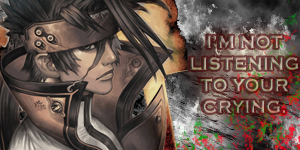
Practice makes perfect, be sure to widen your brush library too, a waaaay better example of this is in my sig.

Now all you SV veterans should know I work in photoshop, so fire yours up. Just like my previous tutorials, Ill list the steps, all you have to do is follow em.
1.)Create a new pic, size it 300x150 and set the bg to transparent. Make sure your colors are set to their defaults. (black and white, just hit your d key to be sure)
2.)Go to filter> render> clouds, then filter> render> difference clouds. You should have something like this:

If it seems too dark or light just go back to difference clouds a couple times.
3.)Next your gunna need some grunge brushes. Plenty on www.brushes.net.tc/
Once you have them uploaded, set your color to black. Make a new layer and dab a few random brushes around. (personally I dont like to use the same one twice) Should have something similiar to this:

4.)Now make ANOTHER layer, and repeat the last step but with white.
5.)Repeat one last time with black. Make sure to delete/redo any layers you dont like.
I've got something like this so far:

I know it still looks ugly, but bare with me. ><
6.)Layer> Merge Visible
7.)Google up a picture, lower its saturation so its grey (Enhance> Adjust Color> Hue/Saturation) and paste it to your sig. Transform (Command T or look under Image) and move it around til it looks like it fits.
THE RESULTS SO FAR:

8.)Now to give it some color! Go to Layer> New Adjustment Layer> Color Balance
This is purely a mess around tool until you get used to it, find a color you like.
9.)Make a new layer. Select All (Command A), have the rectangular marquee tool selected and right click the picture. Select Stroke. 3 pixel width black, repeat with 2 width white, then 1 pixel width black.
10.)Merge Visible. Duplicate Layer. Filter> Blur> Gaussian Blur, set it to 2.5
Change its Blending Mode(its in the layers box), theres a lot of variables for what you should pick so try a few, I went with lighten. Add text and polish it up a bit and your done. Hopefully you didn't follow this guide exactly, I sure sure as hell didn't. Post your results!

Practice makes perfect, be sure to widen your brush library too, a waaaay better example of this is in my sig.


